Creating New OpenSSH Keys with PuTTYgen for WinSCP, Putty, or OpenSSH
Generate the original SSH private key with ssh-keygen
It is generally safer to generate your key with ssh-keygen first, and then import it into PuTTYgen for usage to generate the .ppk file. So let’s do that! By the way, this key has had information modified, and has been deleted immediately after testing. Just to let you know.
PS C:\WINDOWS\system32> ssh-keygen -t rsa
Generating public/private rsa key pair.
Enter file in which to save the key (C:\Users\test/.ssh/id_rsa): C:\id_rsa
Enter passphrase (empty for no passphrase):
Enter same passphrase again:
Your identification has been saved in C:\id_rsa
Your public key has been saved in C:\id_rsa.pub
The key fingerprint is:
SHA256:UxcPxfHY5ZDzU8i+IOCKWXArxuUC3fdtrxtAzBT/VrM user@test
The key's randomart image is:
+---[RSA 3072]----+
|   . .    o.o+++.|
|  . o + o+ . +**o|
|   o = + o=.o.o+*|
|    = + .oo.+..o+|
|   . * .S .o ooE.|
|    o .  . . .o  |
|            ..   |
|            ..   |
|            ..   |
+----[SHA256]-----+
Now open the PuTTYgen GUI Program
Now we have to generate the .ppk file using PuTTYgen. Open PuTTYgen by hitting +R on your keyboard.
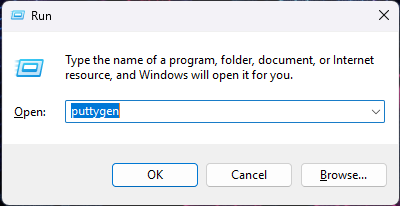
A screenshot of the windows Run prompt for opening PuTTYgen
Then from the PuTTYgen console click the load button. And browse for your private key file which was generated by ssh-keygen
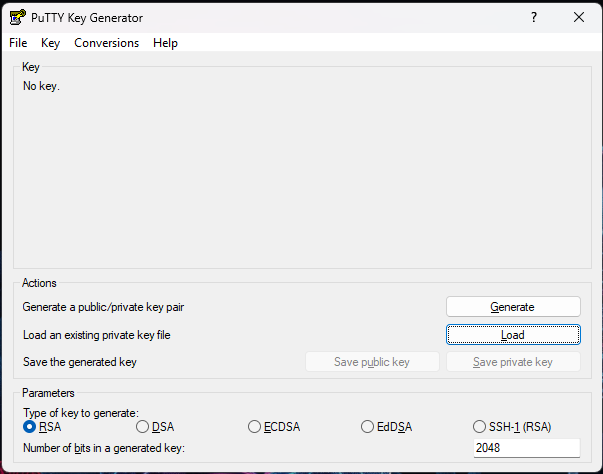
Picture of the PuTTYgen graphical user interface
Load your private key
Click the button that says “Load” to select your private key. Then you will be prompted to enter your password for the private key.

Load your private key
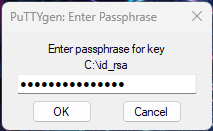
PuTTYgen GUI: Enter Passphrase
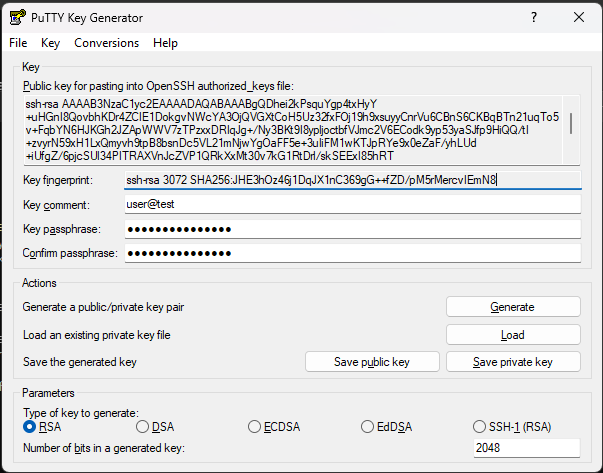
The key should have all the details from your generated certificate
You may get a message box which warns you about the SSH version 2 being used for the key. Go ahead and click “OK” to close the prompt.
Save your private key as a .ppk file

A screenshot of the PuTTYgen Save private key as dialogue
Now take the putty pubkey from the PuTTYgen GUI and upload it to your host panel or place into the authorized_keys file. Likewise, this should work for Lightsail or EC2 on AWS. As long as your key is made to the standards of the AWS platform you are using.
user@server:~$ echo "ssh-rsa <public_key> user@test" >> ~/.ssh/authorized_keys
Now configure the connection with WinSCP
Go ahead and run WinSCP, either by using the run dialogue if the program is in your PATH environment variable, or open it by using the start menu.
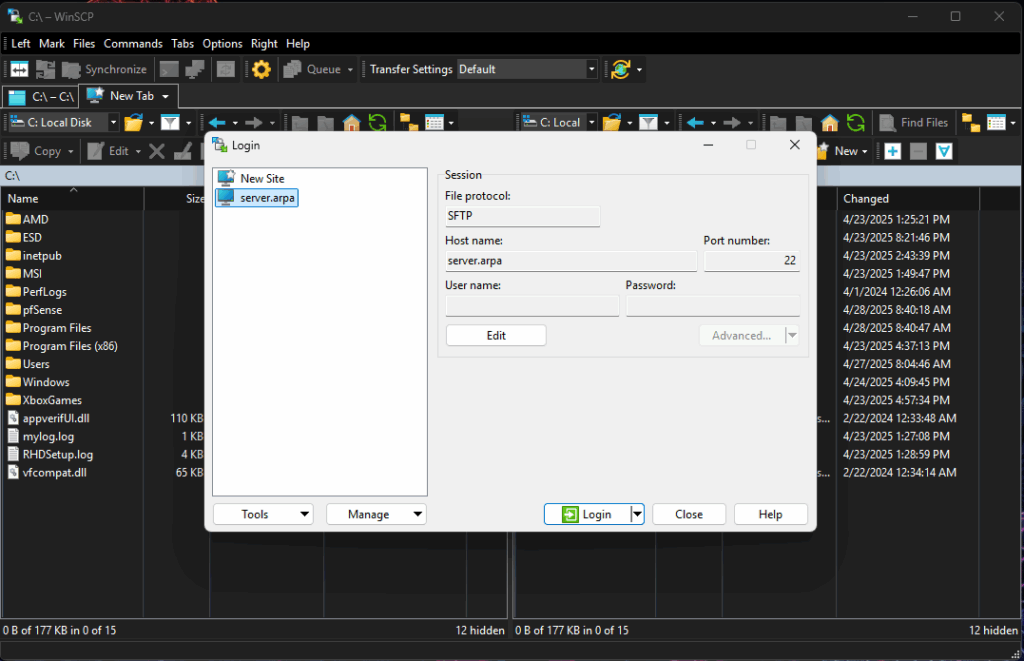
Create a new server profile for the connection
Now click on the button that says “Advanced” to edit connection information. Then go to “SSH > Authentication” under the left panel menu. Then fill out the path for your .ppk private key. Then when you are done, click OK.
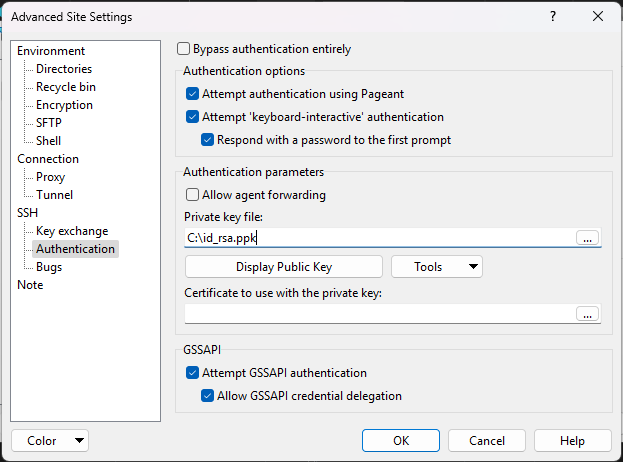
Fill out the path for your .ppk file
Log into the server with WinSCP
Once you have saved your .ppk file into the Authentication dialogue. Go ahead and click “Login”. If you get a warning about connecting to an unknown server and adding its host key to a cache. Go ahead and click “Accept”. Then you will be prompted for your username and password. Go ahead and enter your password for the new connection.
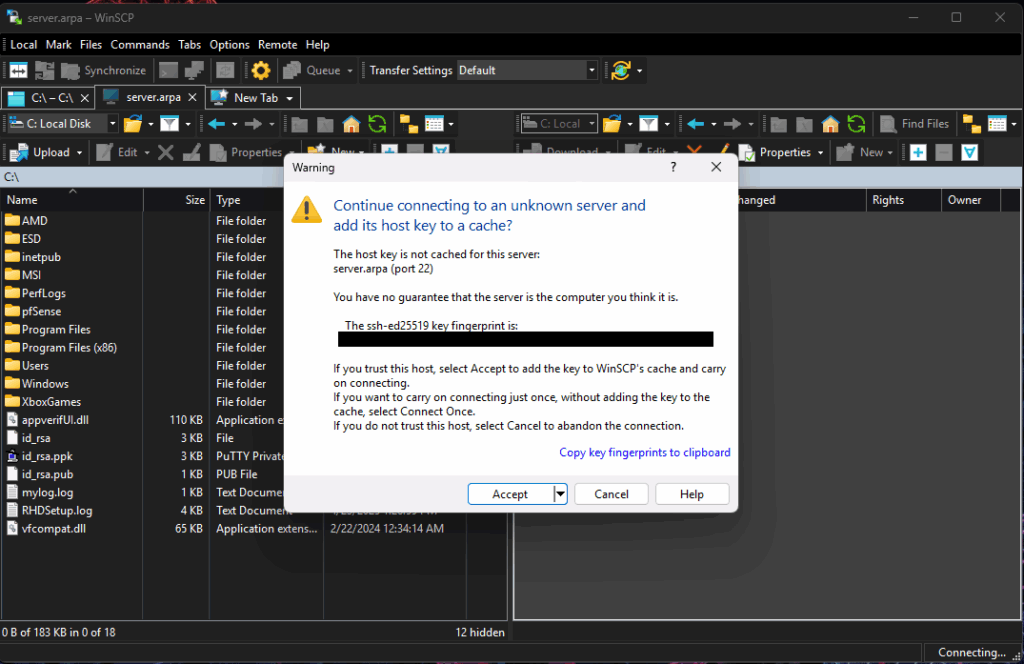
Go ahead and accept the new server key
After you enter your password and hit enter or choosing to continue in the dialogue.
Enter your password
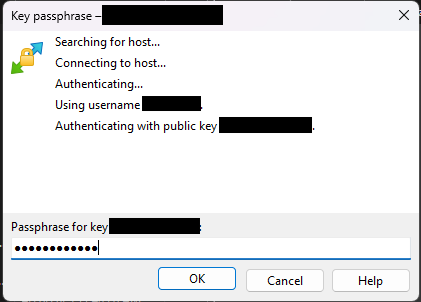
Go ahead and enter your password